Promotions
Knowing the top tutorial design is not just enough to get started on marketing. One should know about everything, from free web hosting to selecting the perfect domain names, as well as using email marketing to its optimum potential.Main Content
A Simple Hit-Test (AS3)
Welcome to Foundation Flash tutorials. In this tutorial you are going to learn an essential part of game development (hit testing), plus:
- Altering dynamic textbox values in AS3
- Refreshing your knowledge of instance name setting
- Referring to existing objects in the external .as file
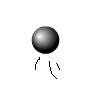
You will be making something that looks a bit like this:
If it looks familiar, it's because this tutorial is an exact copy of the AS2 version, just so it works in AS3 as the hittesting system works a little differently. It's also good to start off with a new project, calling the .as file hittesting.as, and saving it in the same place as the .fla. Set the document class to "hittesting".
So let's start off proper by drawing the two shapes that you want to hit test in the .fla. Draw a circle of one colour and a square of another colour. I made their alpha values 50%, but you don't have to. Convert them to Movie Clips (F8), and call one circle and one square, and give them both instance names of "circle" and "square". You can do that by finding this, highlighted, box when you click on one of them:
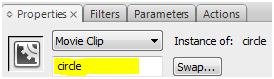
You may want to motion tween them as I have done. Now, draw in a dynamic textbox (put in some standard text, click on it and change the drop down in the properties box to "dynamic"), and give it an instance name of "hittext". Time to add the ActionScript. Move on to the .as file.
package {
        import flash.display.MovieClip;
        import flash.events.*;
        import flash.text.TextField;
        public class hittesting extends MovieClip {
                public function hittesting() {
                        addEventListener(Event.ENTER_FRAME,enterFrameHandler);
                }
                public function enterFrameHandler(e:Event):void {
                        if (circle.hitTestObject(square)) {
                                hittext.text = "Ouch!";
                        } else {
                                hittext.text = "";
                        }
                }//End enterFrame event
        }//End class
}//End package
If you test your project, you should see it working. I'll now explain that code.
package {
        import flash.display.MovieClip;
        import flash.events.*;
        import flash.text.TextField;
        public class hittesting extends MovieClip {
These lines open the package (1), give us use of the Movie Clips (2), and use of the Dynamic text (3). (4) opens the class which has the same name as our .as file (a point which I cannot stress strongly enough). Our first bit of actual code is the one which set the enterFrame event, much as we did in a previous tutorial. This constructor function automatically adds it as soon as the swf is compiled:
             public function hittesting() {
                                                        addEventListener(Event.ENTER_FRAME,enterFrameHandler);
                                                }
and a few lines after that:
if (circle.hitTestObject(square)) {
This is an if statement, as you should well know, but inside that, is the hittest function the structure of this function is: MovieClip1.hitTestObject(MovieClip2). The names you use are the instance names you set earlier, remember?
You must note however, that this simple hit testing will only check if the square box around the Movie Clip is hitting the square box around another Movie Clip, so it isn't very precise, but works fine in many game situations. So, what this line of code is asking is: "Is this Movie Clip hitting that Movie Clip?", and then if it is, it will do what is inside the curly brackets, which is:
hittext.text = "Ouch!";
In other words, make the hittext textbox's text equal "Ouch!". Then, a simple else statement:
                     } else {
                                hittext.text = "";
                        }
                }//End enterFrame event
        }//End class
}//End package
So, if not, it will make the text box equal nothing. The comments show what we end at the end. That is our complete code, so I hope you've learned somthing, and please join us next time for our next tutorial,
Harry (based on Leon's original tutorial).