Main Content
Making a Chess Board
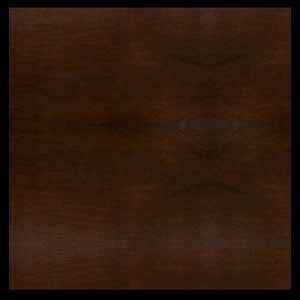
Open a new blank Photoshop document, square, at around 1000 by 1000 pixels. First, fill the background layer with black or very close to black, which will be the area behind the board. Next, you'll need to import a wood texture. You could, of course, go with any wood, but most boards are, and look better, made of mahogany. Find a large texture, or if you can't (I had a hard time) find a smaller section and repeatedly flip alternately downwards to create a larger one. If need be, you can also apply a curves adjustment layer to get that deep, glossy appearance. You should now have something like the screenshot shown.
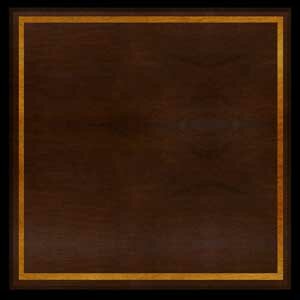
Then, select the entire workspace by pressing CTRL / CMD + A and then press CTRL / CMD + T to make the board slightly smaller and center it. Then double-click the layer in the Layers Panel and apply a bevel as you see fit (I'd suggest a high depth of over 500%). Now we're going to add an inlay, the first of a few. This'll be a band around the outside. So, duplicate your board layer, remove the bevel, rotate or flip it 180 degrees, then apply curves layer to make it a lot lighter. Use the rectangular selection tool, draw a square about 40px in and then minus a square about 12px in from that to create a band. Press the mask button to mask it to this. You'll now have this:
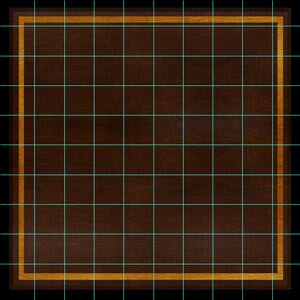
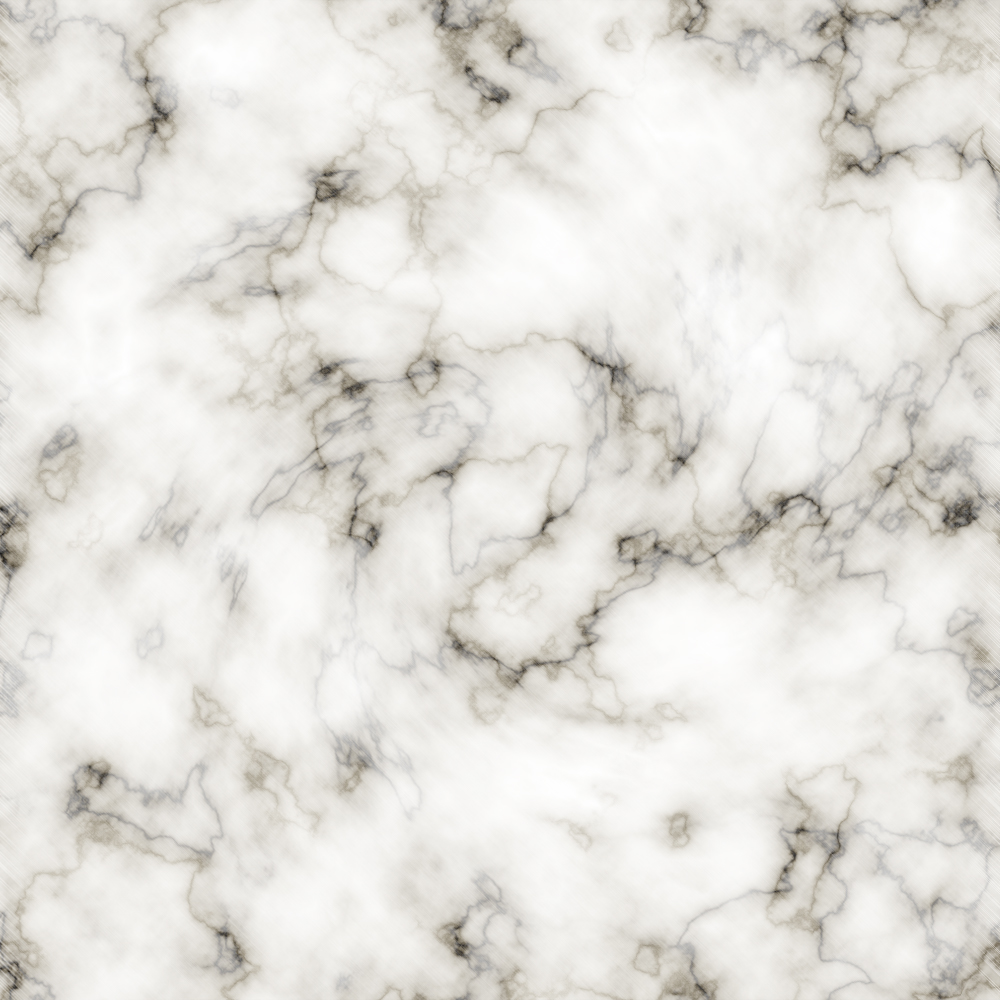
Now retrieve two marble textures: a black or dark one, and a white marble, like this marble texture paste them on separate layers, but hide them. Press CTRL / CMD + R to show rulers if you can't see them already, then divide the middle area into a 8 by 8 square using the guides, which can be accessed by clicking on the ruler and dragging down or right. It does not matter if the marble part is not center as a whole, the tiled part can be moved later, as long as all the squares are the same size. I had this (mine was slightly in the top right, because I used convenient ruler numbers to start):
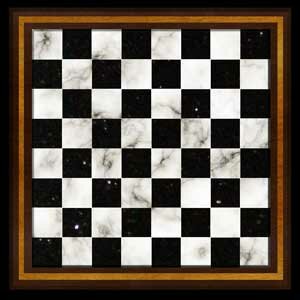
Now, make sure that 'Snap' is on and snap to guide is on, on the View menu. Now, show your first marble layer, take out the selection tool on 'add' and select every alternate square in a checkered pattern, before pressing the 'mask' button. This should almost create the board, but we want the other colour squares as well. To do this, show the second layer (over the top of the first) and CTRL and click the mask thumbnail of first of the two. This will give a checkered selection, which you should now inverse by selecting Select > Inverse. Now take out the rectangular selection tool and use the fourth setting 'Intersect with selection' over the entire 8 by 8 square. Now press the mask button, and it will mask correctly. Press CTRL + ; to hide the guides. You can now see clearly the result. Now merge the two layers and apply a 'down' Bevel and emboss to complete the effect:
There you go, finished and ready to play around with - add a few pieces perhaps. Well, I'll leave that to you (or at least until another tutorial).
James


