Main Content
Advanced Motion
Welcome back to Foundation Flash tutorials. Today we are going to be doing some advanced motion tweening.
In this tutorial you will learn:
- Easing
- Rotation
- Motion Guides
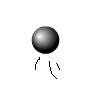
You will need to read the first two tweening tutorials to understand certain parts of this tutorial. What you will make looks like this:

First of all, we will make the basic motion tween. Draw a circle with some sort of picture on it, so that we can see the rotation later on. As you can see, I chose some sort of chubby face. Then convert it to a graphical symbol (F8) called circle, or face, or something. Then create a new key frame in frame 30 (F6), and change the frame rate in the properties panel to 20, as I found 30 was too fast. Then move the circle in the 30th frame to the right hand side of the stage. After that, right click in between the two key frames that you have created and select "Create motion tween". Then press ctrl/command and enter to test your movie. You should see your face/circle/thing moving across the stage in a very simplistic manner. Now, let's make it more advanced, and move on to easing.
Click on the purple arrow between your two key frames on the timeline. The properties panel (below) should now change to show the properties of your tween. Click on the ease and move the slider so that the ease property is 100 out. Let me explain what you have just done.
There are two types of easing; easing out and easing in. Easing in is where you are slow at first and gradually get quicker, and easing out (what you have just done) is where you are fast at first and gradually get slower. The number (in our case 100) determines the excessiveness of the easing effect. i.e. how much it eases.
So if you test your movie you should see you circular thing moving across the stage quickly at first and slowing down at the end. Next we will focus on rotation. We will make it turn twice as it moves. In the properties panel, choose from the rotation drop down menu CW (Clockwise) The other option is CCW (counter clockwise) You can now type in the box next to this menu, setting how many times your object will rotate. Type "2". This process is pretty self-explanatory, so just test your movie to see that you have done it correctly, and we will move on to the motion guide section of this tutorial.
In the layers section of the timeline, just next to the button for adding a new layer, is a button that looks like this:

While Layer 1 is selected, press it, and a new Layer should be created, named "Guide:Layer 1". This is a motion guide for your layer. Select the first frame in your timeline and draw a squiggly line to determine the path of your circular thing from one side of the stage to the other. Then in the first frame, drag your circlular thing onto the beginning of your motion guide until it locks in place, and then in the last frame, drag your circular image onto the end of your guide. This tells Flash where your image should be at the start, and where it should be at the end. It can then fill in the rest. Press ctrl/command and enter to test your movie. It should look vaguely similar to mine and should do what you intended. If it doesn't, review this tutorial to find out where you went wrong, and if you still can't figure it out, email [email protected].
I hope you have found this tutorial useful, thank you for reading it. Look out for my next tutorial.