Promotions
Thanks to and candidates, now we have tutorials for almost everything. It is a part of the curriculum of series, to create tutorials for all tests, from to the complex .Main Content
A Turret Game
Hello and welcome to the first of a three part tutorial in which you will make a small turret game. By the end of today's tutorial you will have just the turret and bullets, but it is still a lot of code:
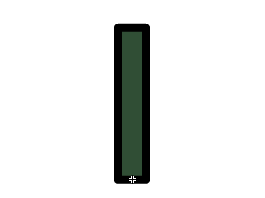
Well, we had best begin by creating the physical components of our Flash. So go to Insert > New Symbol... and make it a Movie Clip called "cannon" and draw the cannon part of our turret:
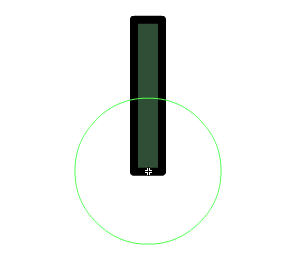
Note the position of the registration point. it is important for rotation purposes. Next draw the base of the turret, in a new Movie Clip called "base":
Lovely. Also note the position of the registration point in that Movie Clip, it is exactly in the centre. I suggest you use the align panel for this. Now create another new movie clip and call it "turret". Inside, place your cannon and your base, like this:
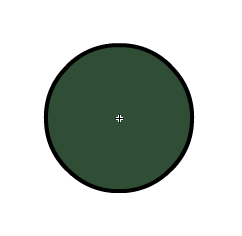
I have outlined the base so you could see where the cannon was centered. Now all we need is a cannonball. Check out this stylish cannonball:

Oh yeah... What style. As you may have guessed, that is in its own Movie Clip called "cannonball". Finally, we are going to link all these Movie Clips. In case you don't know how to do this, go to your library, and right click your Movie Clip you want to link, click link, and check the box "export for ActionScript". In the now open textbox, "Identifier", type the name of your Movie Clip (or any name, it doesn't have to match the Movie Clip's name, but I do it anyway for convienience). Do this for your "turret" and your "cannonball" Movie Clip. This now enables you to attach your Movie Clips from the library to the stage. You can read more about that here.
Now go back into your turret, click on the base and give it an instance name of "base". This is so we can access it later. Repeat this for the "cannon".
Don't put / leave any Movie Clips on the stage.
Now name your one and only layer "actions" and select your first and only frame and press F9 to open its actions panel. Type the following:
attachMovie("turret","turret",1,{_x:275, _y:200});
turret.onEnterFrame = function() {
        mousex = _xmouse-this._x;
        mousey = (_ymouse-this._y)*-1;
        angle = Math.atan(mousey/mousex)/(Math.PI/180);
        if (mousex<0) {
                angle += 180;
        }
        if (mousex>=0 && mousey<0) {
                angle += 360;
        }
        this.cannon._rotation = (angle*-1)+90;
};
function onMouseDown() {
        angle = turret.cannon._rotation-90;
        start_ball_x = turret._x+30*Math.cos(angle*Math.PI/180);
        start_ball_y = turret._y+30*Math.sin(angle*Math.PI/180);
        cannonball_fired = attachMovie("cannonball", "cannonball"+_root.getNextHighestDepth(), _root.getNextHighestDepth(), {_x:start_ball_x, _y:start_ball_y});
        cannonball_fired.dirx = Math.cos(angle*Math.PI/180)*15;
        cannonball_fired.diry = Math.sin(angle*Math.PI/180)*15;
        cannonball_fired.onEnterFrame = function() {
                this._x += this.dirx;
                this._y += this.diry;
        };
}
Don't panic. I'll be explaining it all. In fact, you could probably figure out what it does by looking at it. However, in case you don't know, I'll go through it now.
The first line attaches the Movie Clip "turret" to the stage using the attachMovie function, giving it a depth of 1 and an instance name of "turret". The attach movie function takes in the following parameters:
attachMovie("Identifier","New object instance name",depth,{parameters});
This line attaches to our clips the _x and _y parameters of 275 and 200 respectively, making it the center of the stage. The next few lines make the rotation, which I have gone over in a previous tutorial.
From "function onMouseDown" onwards, we make the cannonballs fire. So, when the mouse button is depressed, an angle variable is set to the rotation of the cannon minus 90 degrees, (because Flash measurements are odd). It then sets the ball starting position variables to just at the tip of the cannon (i.e. 30 pixels from the center) using some simple trigonometry.
Then we attach a cannonball Movie Clip to the sage at the starting posion with a unique instance name and the next highest depth. Now the clever part. It works out a dirx and diry variable whcih will judge how far on each axis it will move each frame. It uses the rotation of the cannon (minus 90), converts it to radians using the "Math.PI/180" conversion formula, then multiplies it by 15 meaning it moves 15 pixels in that direction each frame, giving the illusion of movement. Then it sets the attached Movie Clip's EnterFrame event to make it move in that direction each time.
If when you compile your turret doesn't move and the balls stay in the top left, follow these steps, which are in video format.
Thank you for reading, we will make the enemies in the next tutorial,
Leon.