Promotions
professionals who also have a or a to their credit, direct tutorials for the benefit of students studying for . This helps them in preparing for the .Main Content
A Turret Game - Part 2
Hello and welcome to the second of a three part tutorial in which you will make a small turret game. By the end of today's tutorial you will know how to hittest attached Movie Clips using arrays:
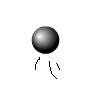
Well, we had best begin by creating the physical components of our Flash. So go to Insert > New Symbol... and make it a Movie Clip called "evil" and draw a bad looking guy:

Now all we need is a cannonball. I'll be using the same stylish cannonball as from the previous tutorial:

Oh yeah... What style. As you may have guessed, that is in its own Movie Clip called "cannonball". Finally, we are going to link these movie clips. In case you don't know how to do this, go to your library, and right click your Movie Clip you want to link, click link, and check the box "export for ActionScript". In the now open textbox, "Identifier", type the name of your Movie Clip (or any name, it doesn't have to match the Movie Clip's name, but I do it anyway for convienience). Do this for your "evil" and your "cannonball" Movie Clip. This now enables you to attach your Movie Clips from the library to the stage. You can read more about that here.
Don't put any Movie Clips on the stage.
Now name your one and only layer "actions" and select your first and only frame and press F9 to open its actions panel. Type the following:
var start_enemy_x = 40;
var start_enemy_y = 40;
var start_cannon_x = 550;
var start_cannon_y = 200;
enemies = [];
evilBreak = setInterval(evilSpawn, 1000);

function evilSpawn() {
        evilguy = attachMovie("evil", "evil"+_root.getNextHighestDepth(), _root.getNextHighestDepth(), {_x:start_enemy_x, _y:start_enemy_y});
        enemies.push(evilguy._name);
        evilguy.onEnterFrame = function() {
                this._y += 3;
                if (this._y > 420) {

                        this.removeMovieClip();
                }
        };
}
function onMouseDown() {
        fired_cannonball = attachMovie("cannonball", "cannonball"+_root.getNextHighestDepth(), _root.getNextHighestDepth(), {_x:start_cannon_x, _y:start_cannon_y});
        fired_cannonball.onEnterFrame = function() {
                this._x -= 20;
                if (this._x < 0) {
                        this.removeMovieClip();
                }
                for(x in enemies){
                        if (this.hitTest(_root[enemies[x]])) {
                                _root[enemies[x]].removeMovieClip();
                                this.removeMovieClip();
                                enemies.splice(x, 1);
                        }
                }
        };
}
Don't panic, because once again, I'll be explaining it all. In fact, you could probably figure out what it does by looking at it. However, in case you don't know, I'll go through it now.
First, I set four varibles, these are our starting x and y positions of our ba guy and our bullets.
Next, I create an array to hold all of our evil guys. This array is, at the moment, empty.
Then we create an interval, which carries out the function evilspawn (not declared yet) every second. After that, we create that function. In the function, we attach our evil Movie Clip to the stage at our previously mentioned x and y points. Then, it adds the instance name (_name) of the Movie Clip to our array, using the push method. i.e. array.push(item to add to array). Next, it sets the attached Movie Clip's onEnterFrame events, so it moves it 3 pixels down and removes it if it goes off the bottom of the screen.
From "function onMouseDown" onwards, we make the cannonballs fire. So, when the mouse button is depressed, it is attached and moves 20 pixels left every frame, and if it goes off the screen, it is destroyed.It also adds to the enter frame function, a for loop. This checks every position in the enemies array, which is referenced as x, each run through the loop, then checks a hittest between the bullet and each enemy in the array. There fore the hittest is between every bullet and every enemy.
Thank you for reading, we will put it all together in the next, and final tutorial,
Leon.